A Step-By-Step Guide On How To Prune Salvias

Image source: RM Floral/Alamy Stock Photo
A Step-By-Step Guide On How To Prune Salvias
Salvias are a popular and versatile plant that can add colour and fragrance to any garden. However, to keep your salvias healthy and looking their best, it's important to prune them regularly. Pruning not only promotes healthy growth and flowering, but it can also prevent disease and pests from taking hold. In this blog post, we'll guide you through the process of pruning salvias step by step, so you can feel confident and equipped to care for your plants. Whether you're an experienced gardener or a beginner, you'll find everything you need to know about how to prune salvias effectively and efficiently.
Step 1: Know When to Prune
Pruning salvias at the right time is essential to ensure healthy growth and flowering. The best time to prune salvias depends on the type of salvia you have and the climate in your area.
For most salvias, the best time to prune is in late winter or early spring, just before new growth begins. This will encourage new shoots to grow and produce more flowers. However, some types of salvias, such as those that bloom in autumn, should be pruned after they finish flowering in late summer or early autumn.
To determine when to prune your salvias, you can look for signs such as:
- Dead or damaged foliage: If your salvias have dead or damaged foliage, it's a sign that they need pruning.
- Overgrown or leggy branches: Salvias that have grown too tall or have branches that are too long or low can benefit from pruning.
- End of blooming period: If your salvias have finished blooming, it's a good time to prune them to promote new growth and prepare them for the next blooming season.
- By pruning salvias at the right time, you can encourage healthy growth and beautiful blooms year after year.
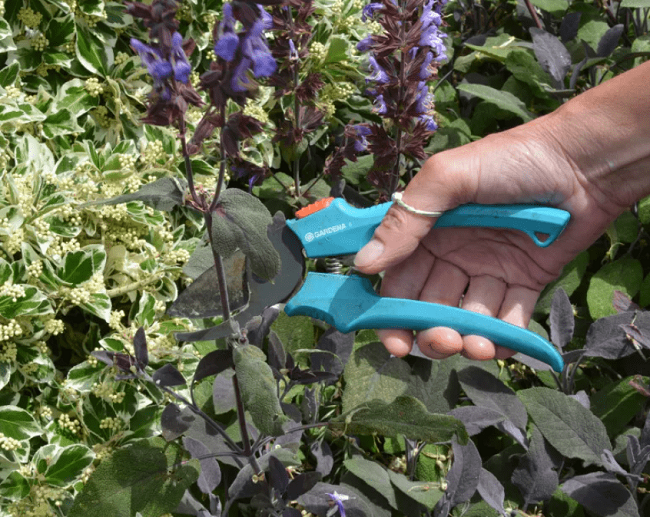
Image source: Future
Step 2: Gather the Right Tools
Before you start pruning your salvias, it's important to gather the right tools to ensure a clean and effective cut. Here are some of the tools you'll need:
- Pruning Shears: You'll need a good quality pair of pruning shears to cut through the branches of your salvias. Look for shears that have a sharp blade and a comfortable grip.
- Gloves: Wearing gloves will protect your hands from scratches and cuts as you prune your salvias.
- Loppers: If your salvias have thicker branches, you may need a pair of loppers or a pruning saw to cut through them.
- Disinfectant: It's important to disinfect your tools before and after pruning to prevent the spread of disease. You can use a solution of one part bleach to nine parts water, or rubbing alcohol.
When selecting your tools, make sure they are clean and sharp. Dull or dirty tools can damage the branches of your salvias, making it harder for them to heal and grow properly.
By gathering the right tools, you'll be able to prune your salvias efficiently and effectively, without causing any harm to your plants.
Step 3: Identify the Branches to Prune
To prune your salvias effectively, you'll need to identify the branches that need to be pruned. Here are some tips to help you identify the right branches:
- Dead or Diseased Branches: Look for branches that are dead, diseased, or damaged. These branches can attract pests and diseases that can harm the rest of your plant.
- Overgrown Branches: Salvias can become overgrown if left unpruned, leading to a less bushy appearance. Identify branches that are too long, too low or too crowded to allow for proper airflow.
- Flowering Branches: Salvias are known for their beautiful blooms. Look for flowering branches that have finished blooming, and cut them back to encourage new growth.
When deciding how much to prune, aim to remove no more than one-third of the plant's total growth. Removing too much can shock the plant and slow its growth.
It's important to make clean cuts when pruning your salvias. Use your pruning shears or loppers to make a clean cut at a 45-degree angle just above the bud. Avoid cutting too close to the bud, as this can damage it.
By identifying the right branches to prune, you can promote healthy growth and keep your salvias looking beautiful all season long.
Step 4: Prune the Salvias
Now that you've identified the branches that need to be pruned, it's time to start pruning your salvias. Here's how:
- Start with the Dead and Diseased Branches: Begin by cutting out any dead, diseased, or damaged branches. Use your pruning shears or loppers to make a clean cut at a 45-degree angle just above the bud.
- Trim the Overgrown Branches: Cut back any branches that are too long, too low or too crowded to allow for proper airflow. Aim to remove no more than one-third of the plant's total growth.
- Cut Back the Flowering Branches: If your salvias have finished blooming, cut back the flowering branches to encourage new growth. Cut just above the next bud or leaf.
- Shape the Plant: Once you've removed the dead, diseased, and overgrown branches, step back and take a look at the overall shape of your plant. Use your pruning shears or loppers to shape your salvias by removing any unwanted branches or foliage.
Remember to make clean cuts at a 45-degree angle just above the bud or leaf, and avoid cutting too close to the bud or leaf, as this can damage it.
After you've finished pruning your salvias, be sure to clean up any debris and dispose of it properly. This will help prevent the spread of disease and pests.
By following these steps, you can effectively prune your salvias and promote healthy growth and beautiful blooms.
Step 5: Clean Up and Care for Salvias
After you've finished pruning your salvias, it's important to clean up and care for them properly. Here are some tips to help you do just that:
- Dispose of the Cuttings: Gather up the cuttings and dispose of them properly. You can add them to your compost pile or dispose of them in the green waste bin. Just make sure not to leave any debris around the base of your salvias, as this can attract pests and diseases.
- Water Your Salvias: Give your salvias a good drink of water after pruning to help them recover from the shock of being pruned. Water them deeply, but don't overwater, as salvias don't like wet feet.
- Fertilize Your Salvias: After pruning, it's a good time to give your salvias a boost of nutrients with a balanced fertilizer. Follow the instructions on the fertilizer package and apply it around the base of your salvias.
- Monitor Your Salvias: Keep an eye on your salvias in the days and weeks after pruning. Watch for any signs of stress or disease, and take action if necessary.
Remember to continue to care for your salvias throughout the growing season, including watering, fertilizing, and deadheading. With proper care, your salvias will thrive and provide you with beautiful blooms all season long.
By following these steps and caring for your salvias properly, you can ensure healthy growth and beautiful blooms year after year.
Conclusion
Pruning salvias is an important task for any gardener who wants to keep their plants healthy and looking their best. By following these five steps, you can effectively prune your salvias and promote healthy growth and beautiful blooms.
Remember to prune your salvias at the right time, gather the right tools, identify the branches to prune, make clean cuts, and care for your salvias properly after pruning.
Pruning salvias may seem daunting at first, but with a little practice and patience, you'll soon become an expert at it. With proper care, your salvias will reward you with beautiful blooms and a healthy, vibrant appearance all season long.
We hope this guide has been helpful for you. Don't hesitate to reach out to gardening experts or your local nursery for further advice or information. Happy pruning!
Blog Categories
Recent posts
- Daffodils: The March Birth Flower's Hidden Chemistry
- 6 Good-Luck Plants That Actually Last (and 2 That Are Pet-Safe)
- The Language of Flowers: The Smile You Can't Fake, and 4 Flowers Worth Sending
- Sending Flowers to Her Work: What to Send That Survives the Week
- Why Red Flowers Don't Mean the Same Thing Everywhere
- Sustainable Flowers Without the Greenwashing: A Working Florist's Honest Guide
Follow Us On Google News